DIY Fall Wreaths
It’s no secret that I’m not a crafty person but something about this time of year, fall through Christmas, makes me want to pull out the glue gun and ribbon to channel my inner crafty self. While I do have a few fun fall projects planned, I promise I’m not turning into a crafty gal. That just isn’t me.
What I do love is fun and festive seasonal decor and the first thing that pops into my mind is a welcoming, beautiful wreath to display on the front door of our home for all to see.
I made a fall wreath several years ago but had to dismantle it to make a Christmas wreath and since I loved the Christmas wreath so much, I decided to keep it decorated in evergreens and a red velvet ribbon promising that next fall I would make a fall wreath.
That was three years ago and “next fall” never came… until this year.
One of the greatest things about hosting a series all about fall on my blog is that it keeps me super intentional about actually completing some plans I have place!
I have a Pinterest board filled with lovely, elaborate and beautiful wreaths but the truth is, I need to make one that doesn’t require a lot of gluing, sewing or other craft skill that I severely lack. For me, the simpler the better.
However something came over me and I decided to make not one but two fall wreaths!
One for our front door and another to hang on our mantle in the living room. In full honesty, one was super easy to make and the other…. well let’s just say it required more skills than I was prepared for!
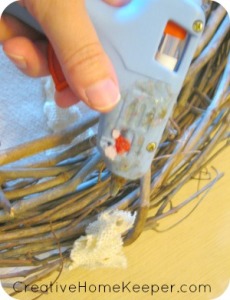
I’m sharing my wreaths with you today in a fun little tutorial but I have to say wreath making is so personalized. Anyone can make a wreath and customize it to their tastes and preferences. Also you are going to see my really old and worn glue gun that my mom has been using since I was a child. There is a lot of “stuff” attached to the gun itself, it’s not pretty but it gets the job done!
DIY Fall Wreaths
Fall Wreath #1
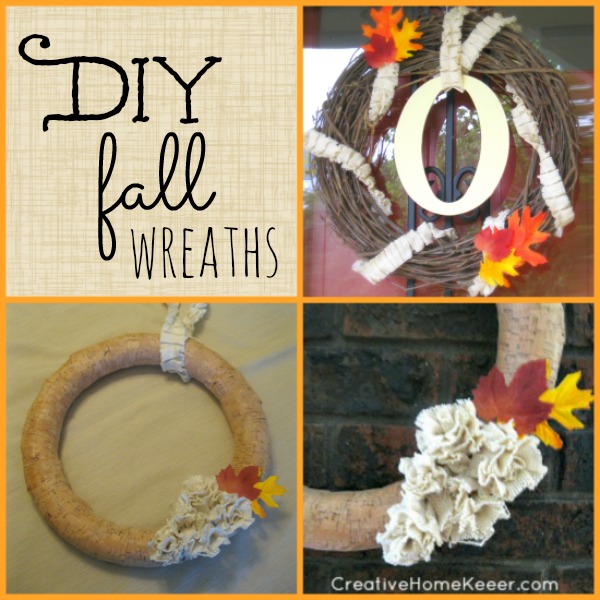
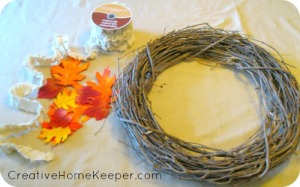
This was the easiest wreath to make because all it required was a grapevine wreath, some burlap ribbon (I found some at Michael’s that was already sewn to have that bunched up look), some decorative velvet leaves (I already had some of these on hand too) and the hot glue gun.
Supplies Needed:
Burlap ribbon
Decorative Leaves
Hot Glue Hun
Monogrammed Initial of your Last Name *optional
Step One
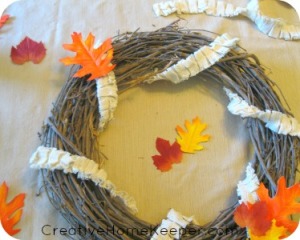
Take the burlap ribbon and wrap around the wreath. I left about 2-3 inches between wraps. Use glue to secure the ribbon to the wreath before wrapping. Trim the remaining ribbon and glue to secure the end.
Step Two
Use remaining ribbon to loop around the top to form a hanger to attach to the door.
Step Three
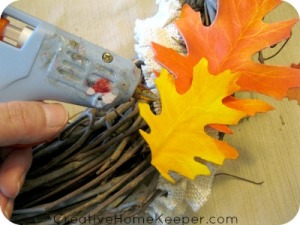
Gather a few decorative leaves (you could also use real leaves if you can’t find decorative ones) and arrange a few to glue around the wreath in whatever placement you wish. I chose to just use a few leaves but you could use however many you like. Use glue to secure them to the wreath. I made sure to glue them both directly to the grapevine itself and to the ribbon making sure they were securely attached.
Step Four
Hang on the front door using the the extra ribbon looped around the top. I also hung a wood monogrammed O in the middle (for our last name) that I already had panted (remember that wreath I made a few years ago?) I think it adds a nice personalized touch but definietly isn’t necessary if you don’t already one. I did notice at Michael’s they had several alphabet letters in all shapes, sizes, materials and colors throughout the store at various price points.
I was’t too happy some of the the ribbon I initially wrapped around the grapevine wreath got pulled down leaving the ribbon wrapping to look unevenly spaced apart. Next time I should remember to wrap the ribbon around more times and secure the top portions of the ribbon with glue to make sure the ribbon stays in place.
Fall Wreath #2
While I’m pleased with the way this wreath turned out, it definitely took a little extra effort on my part to complete which was something that I didn’t plan. I also ran out of ribbon halfway through and had to run back to Michael’s to purchase another strand (thankfully I live very close to one!)
Supplies Needed:
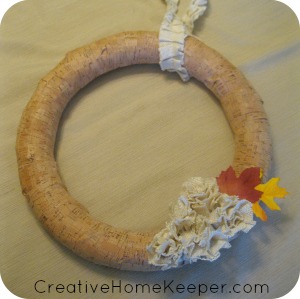
Ribbin of Choice- I found this really neat ribbon that looked and felt like natural cork at Michaels
Decorative Leaves
Burlap Ribbon- I’m using the same I used for the wreath above
Hot Glue Gun
Step One
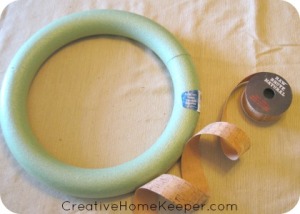
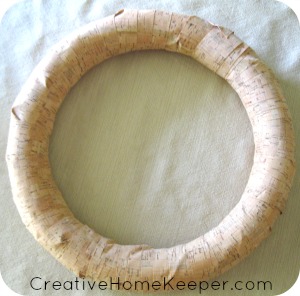
Using the glue gun, place a thin line of glue on the foam wreath to securely attach the ribbon to. Next begin wrapping the ribbon around the wreath, pulling tightly so that gaps don’t occur.
I found this step to be harder than I originally thought because the ribbon kept gaping if I didn’t pull hard enough and in some places I had to go back and unwrap to pull tighter. I probably over-wrapped in some areas which is why I needed more ribbon. Despite having a some areas where the bunching is uneven and some gaps occur, I like the way it looks… perfectly unperfect. I think it adds to it’s natural appeal.
Step Two
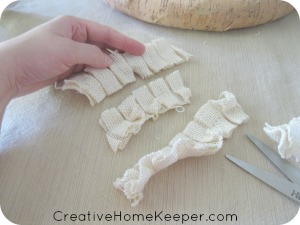
Cut some strips from the burlap ribbon in about 4-6 inch strips.I cut about 5 different strips but you could cut as many or as few as you would like
Step Three
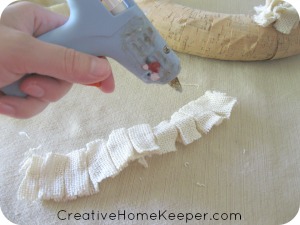
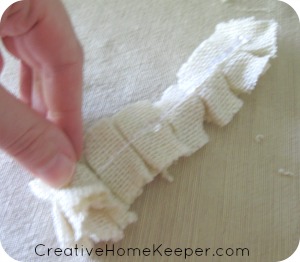
To make the burlap bunches place a fine line of glue down the center of the strip. Then roll the strip up to form a small flowery looking bunch. Some people attach a small pin through the base to help keep the bunch together. I didn’t have any small pins so I added a little glue around the base.
 Step Four
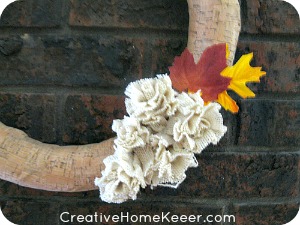
Glue the flowery bunches to the wreath by placing some hot glue directly on the wreath then attaching the flower bunch. To make sure they were extra secured, I also added some glue around the bases of the bunches after they were securely in place.
Step Five
Arrange a few decorative leaves around the flower bunches, attaching with the glue. I chose to only use a few that way I could easily remove them and add some more seasonally appropriate decor to make the wreath usuable year around.
Step Six
Loop some of the extra ribbon through the top of the wreath and tie to hang.
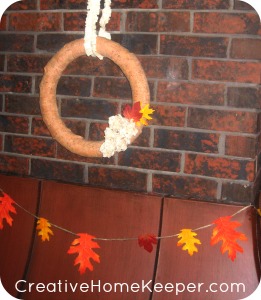
I hung this wreath on our brick hearth (I’ll be sharing more of our simple fall home decor next week) to add a little touch of fall hospitality to the inside of our home as well. Wreaths are simple ways to add a little touch of the season to your home. While I caution against it due to my lack of discipline (see above) you can also dismantle wreaths to re-purpose as the season changes.
All of these supplies I purchased at our nearby Michael’s with a coupon that was available in the Sunday paper. I spend about $15 but have plenty of the burlap ribbon left over to use for future projects or to donate to someone who has more crafty skills than I do! 😉 (I’m not a Michael’s affiliate in any way, I purchased the supplies with my own money)
Do you make seasonal wreaths for your front door?
To see even more wreath ideas, you can check out my Pinterest Wreath board below.
Follow Victoria @ Creative Home Keeper’s board Wreaths on Pinterest.
This post is part of the 31 Days of Savoring Fall Series. Click here to see all the posts in the series.
Affiliate links may be used in this post meaning, at no additional cost to you, if you click through and make a purchase, I receive a small commission. Thank you for supporting CHK! You can read my disclosure policy here.
 Is meal planning a struggle? I'm so excited to announce... The CHK Seasonal Meal Planner is now available!!! Plan your meals with purpose and intention as you think through special days, holidays, and what each season uniquely offers. It will guide you, step-by-step, through planning each month allowing you to save time and money.










Love this! I need more fall decorations in my house but am not very crafty. This is perfect!
Thanks Becky, glad to know there are fellow non-crafters out there 🙂
I’m not crafty, either, but I do love decorating. Thanks for keeping it simple for us!
I love seasonal decor too but simple is better for me, especially in this season of life 🙂
Love both of the wreaths… Just picked a grapevine wreath from Michaels today so that I can make my fall wreath this weekend. Pinning this.
Have fun with your wreath Marlys!
I love fall too. Thanks for the cute tutorials. Wreaths are one of my favorite things to make.