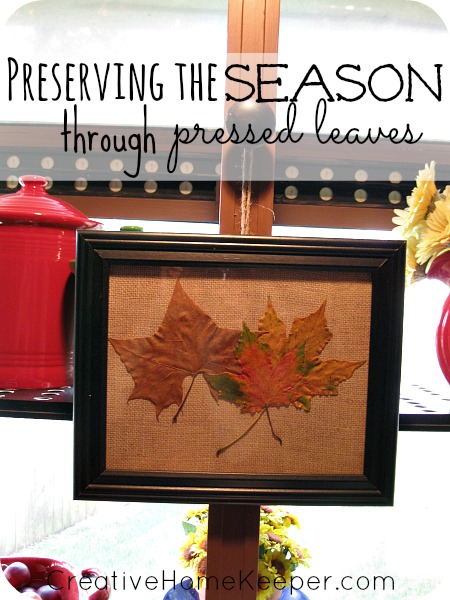
Preserving the Season Through Pressed Leaves
 Is meal planning a struggle? I'm so excited to announce... The CHK Seasonal Meal Planner is now available!!! Plan your meals with purpose and intention as you think through special days, holidays, and what each season uniquely offers. It will guide you, step-by-step, through planning each month allowing you to save time and money.
 Back in September when I first started planning through what projects and posts I would write about during this fall season I remembered a project that I had clipped from a Better Homes and Garden magazine years ago.
The craft project seemed simple enough, decoupage leaves on a pillar candles to make fun, festive fall candle decor.
While that sounded easy enough let me tell you something… trying to decoupage leaves to a candle is almost impossible.
IMPOSSIBLE!!!
I must have tried for twenty minutes with several layers of Mod Podge glue with no luck. That leaf was just not going to stick.
I finally surrendered, not all craft projects work after all.
I’m not sure what type of glue or candle surface the editors at BHG had to work with, but I just couldn’t get the same results that were pictured with the measly two sentence directions.
I know that I’m not crafty, but I definitely felt defeated.
The candles I will be able to use something else and the Mod Podge glue I have already used to make my gratitude journal and I’m sure there will be other uses for it in the future. But I still had a pile of fresh leaves that the kids and I had collected that I wanted to do something with, other than just throw them back into the yard.
My leaf garland had already been made and most of our fall decor was in place but then I remembered about another craft project that I had also seen in an issue of BHG. Still trying to recover from my previous attempt at crafting failure, I was pretty sure that I couldn’t mess this project up.
And I was right, preserving leaves is not hard at all. In fact it really is quite easy.

Preserved Leaves Wall Art
Supplies Needed

Picture Frame– I had an 8 x 10 in the closet that I haven’t gotten around to using for anything yet.
Scrapbook paper– I used a piece that had a simple, neutral burlap print, but you could use any pattern color your like.
Twine– left over from all the other projects I had been working one
Leaves– The kids and I gathered some from outside.
Step One
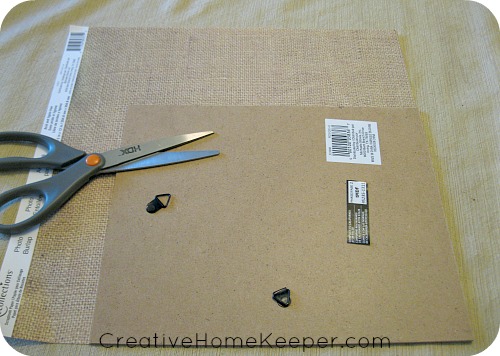
Cut the craft paper to fit inside the frame. I like to use the back of the frame to trace as my template.
Step Two
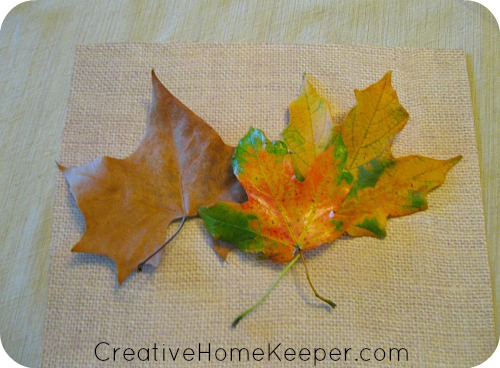
Lay the leaves in-between the picture frame glass and craft paper. Secure the photo frame backing to press the leaves.
Step Three
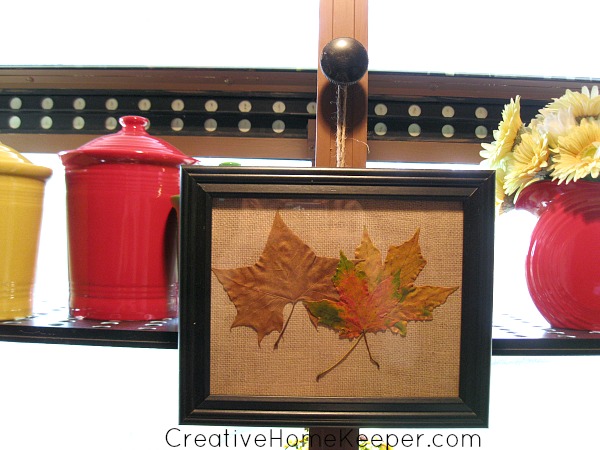
String some twine from one of the wall hooks on the back of the frame. Add the pressed leaves to your fall decor to for a quick and inexpensive touch of the season to your home.
I hung my pressed leaves frame above the kitchen sink on our window box. I love to look at the leaves when I’m doing the dishes or other work on the kitchen. As with all things fall, it makes me happy to see small touches of the season throughout the house.
So even though my initial project was a complete fail, I was able to redeem myself and create a project that truly was quick and easy!
Have you ever recovered from a gigantic crafting failure?
This post is part of the 31 Days of Savoring Fall Series. Click here to see all the posts in the series.